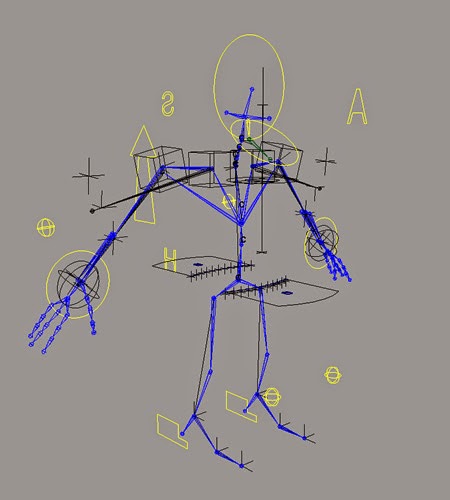
The process of Rigging is the concept and staging of creating a skeleton for a 3D model that is needed to be animated. Each skeleton could be different dependent on the model’s shape and their demands of how it needs to move and be animated. By the end, it all comes down to how the animators want the model to deform and creating an easy enough menu for them to be able to use the controls of these deformations to move this character.
“Rigging is the process of creating an organized system of deformers, expressions and controls applied to an object so it can be easily and efficiently animated. A good rig should intuitively allow an animator to concentrate on the art of animation without the technical aspects of rigging getting in the way. In addition, a good rig should be well organized so it can easily be changed, repurposed, or fixed if there is a problem.”
Usually Rigging proceeds with a pipeline of planning and finishing a rig with the steps below. We will be using a hand model as an example for these steps:
Analyse the problem:
We first design a rig for the hand model. Consider the number of joints needed to make the fingers curl, and in what directions, are required. Where would be the main base joints that controls the whole hand i.e. the wrist, and how far do you want the fingers to spread and curl in towards the palm.
Figuring out what and how to set up the controls so they are easy to understand and use for animators is also necessary in the step. So for this example, we need a control for the whole hand controlling the bend and flip of the wrist, and we need some separate controls for each finger and their own curl and spread attributes.
Test of the Solution:
We smooth bind the rig to the model and see how the joints work with the topology. Sometimes more topology or more joints on the rig are needed to make the combination work more smoothly and make the deformations easier. To make this work, unbinding the hand model from the created rig and doing the smooth bind process over and over again is necessary to see if improvements are happening or not.
Also giving this test rig to an animator to see if he/she is able to use the rig system you created and also fulfil its needs to deform to the lengths they want the character to, must be noted for future improvements in the re-making of this rig.
Solution Analysis:
Usually the first rig created would have flaws for both the modeller and the animator. For this example, the hand control is fine, but the fingers curling and spreading attributes needed more work. They weren’t following the joints as they were supposed to. I assume this was due to hierarchy issue during the parenting and constraints.
The hand itself wasn’t as fluent with movement and flexible as I wanted for expression and animated hand gestures. This rig could also help if I wanted to just pose this hand for rendering/texturing shots but I wanted to make this efficient and usable for animators too.
Recreating of the clean solution:
After much frustration, it was decided to just to rebuild the rig from scratch. Though for the second round, I made sure to delete all history on the hand model itself after I added a few more edge loops around the fingers, wrist and thumb.
And I redesigned the hand control to make it easier to understand and also more visually appealing.
Final recreating:
After much editing with the joint positioning and also the topology of the hand model, it was working smoothly with a heatmap smooth bind in Maya. Locking and hiding alot more of the unneeded attributes did help with the process as that’s what may have disrupted the first rig’s success. Fear in rigging did hinder this project but with this assignment along with my showreel, just showed that each project needs a customised rig to do what was needed to be done.
Not all of the necessary turns, bends and transformations are needed for all characters and models. But to get the action poses you desire for the renders, need to go through quite a few number of test trials of the rig and model together. This was a great test for myself on speed, priorities and memory based on repetition.
“…joints are really just another deformer. Sure they get their own set of menus and a whole bunch of cool options, but when you get right down to it, their main purpose is to deform geometry.”


0 comments:
Post a Comment
Leave a comment